
Showing posts with label tutorial. Show all posts
Showing posts with label tutorial. Show all posts
Friday, June 25, 2010
Tutorial: Seemless Patterns
If you ever find yourself needing to make a seemless pattern, Veerle's Blog has a great Photoshop tutorial for you to read. Check out her post HERE.


Monday, June 21, 2010
Tutorial: How to Draw a Manga Face

Friday, April 9, 2010
Tutorial: UsabilityPrinciples

Monday, March 8, 2010
Tutorial: Depth of Field Shift
In last week's post, I gave a quick tutorial on how to give a tilt-shift effect on photographs that have been shot from above. This same technique can be applied to photographs shot from eye level which can alter their depth of field.
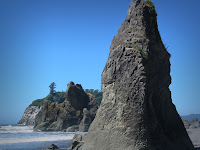 In this example, I have used a photograph I took on the Olympic Peninsula, WA. The photo to the right is the unaltered version. Make the duplication layer just like in the previous tutorial and add a layer mask to it.
However, since this effect will be seen from eye level, a simple reflected gradient mask will not necessarily work to give the desired effect. Other objects in the foreground might be on the same plane as objects in the middle or background that we wish to give focus to, therefore a more precise layer mask is needed.
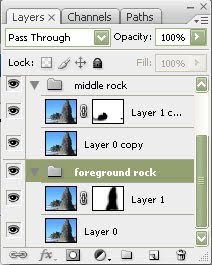 On this example I created two different groups to demonstrate the effect. The first group, named "foreground rock", shows the masked rock in the foreground created using the either the quick mask mode or using a black brush on the blurred layer mask. The second group, named "middle rock" shows the masked out rock in the middle ground. Remember we are manipulating the layer that has been blurred and masking out the area that we want to be sharp, which is the layer underneath it.
Here are the final results for the two different depth of field alterations to the photograph:
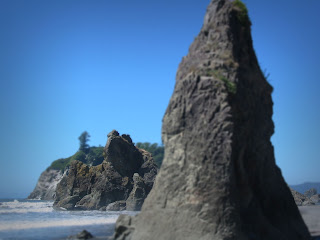
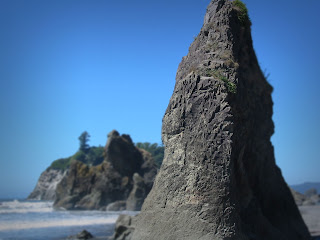
A great way to give an interesting effect to a Flash animation is to use images that you can alter the depth of field to. Just open up the Flash file, import the two images onto separate layers, make them into movie clips and then tween the alpha (opacity) between the two which will give the effect of a lens depth of field shift from foreground to middle ground or background.
 In this example, I have used a photograph I took on the Olympic Peninsula, WA. The photo to the right is the unaltered version. Make the duplication layer just like in the previous tutorial and add a layer mask to it.
However, since this effect will be seen from eye level, a simple reflected gradient mask will not necessarily work to give the desired effect. Other objects in the foreground might be on the same plane as objects in the middle or background that we wish to give focus to, therefore a more precise layer mask is needed.
 On this example I created two different groups to demonstrate the effect. The first group, named "foreground rock", shows the masked rock in the foreground created using the either the quick mask mode or using a black brush on the blurred layer mask. The second group, named "middle rock" shows the masked out rock in the middle ground. Remember we are manipulating the layer that has been blurred and masking out the area that we want to be sharp, which is the layer underneath it.
Here are the final results for the two different depth of field alterations to the photograph:


A great way to give an interesting effect to a Flash animation is to use images that you can alter the depth of field to. Just open up the Flash file, import the two images onto separate layers, make them into movie clips and then tween the alpha (opacity) between the two which will give the effect of a lens depth of field shift from foreground to middle ground or background.
Friday, March 5, 2010
Tutorial: False Tilt-Shift Photo Effect
 I was very inspired by THIS amazing video which uses a post-production false tilt-shift camera effect to make city scenes seem miniaturized. I went through some of my old photographs to see how they would look with the effect. It is best to use a photograph that has been shot from above the subject or location. The photo to the right is my starter image, shot on a bridge in Seattle.
Open the image in Photoshop and create a duplicate layer of the image (Control + J). Use a Lens Blur Filter on this duplicate layer.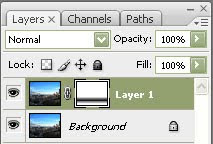

Now create a Layer Mask on the blurry layer. On the Layer Mask, use a Reflected Gradient on the area you wish to be the main subject of the image.
Normally, it is best to exaggerate the saturation levels to give it that "not real" feel but this photo was already brightly colored. I did, however, adjust the curves.
For the final touch, I created a low opacity layer with a black fade around the corners to give it that extra focus in the center. Done! Here is the final image. Click to enlarge it.

UPDATE:
Here are a few more examples of this effect on some of my other photographs. Click to enlarge.


Friday, February 26, 2010
Tutorial: Painting in Photoshop

There is a great tutorial by Ryan Mauskopf on deviantART about painting in Photoshop. Have a look at this easy 10 step process HERE.
Subscribe to:
Posts (Atom)